Goodbye to the days when signing, documenting, printing, and scanning the most important documents was a hassle. It is now manageable with the palm of your hand. Whether you desire to sign a contract or complete a form, mobile documentation offers convenience and efficiency at the same time. The utility of both devices regarding mobile documentation can vary, depending on the features they offer. Here’s a simple step-by-step guide on how to sign documents on iPhone for free.
How to sign documents on iPhone with Apple’s Markup tool
The iPhone offers annotation through Apple’s Markup tool. This tool has made it super efficient to sign documents on iPhones. It includes annotation through emojis, images texts etc. Here’s how to do it:
1. Open the PDF document required for signing. It will open that PDF file in Apple’s Default PDF viewer.
2. The markup tool appears in the bottom-right corner of your app for visualizing the document. It looks like a pen tip enclosed within a circle. Tap on it.
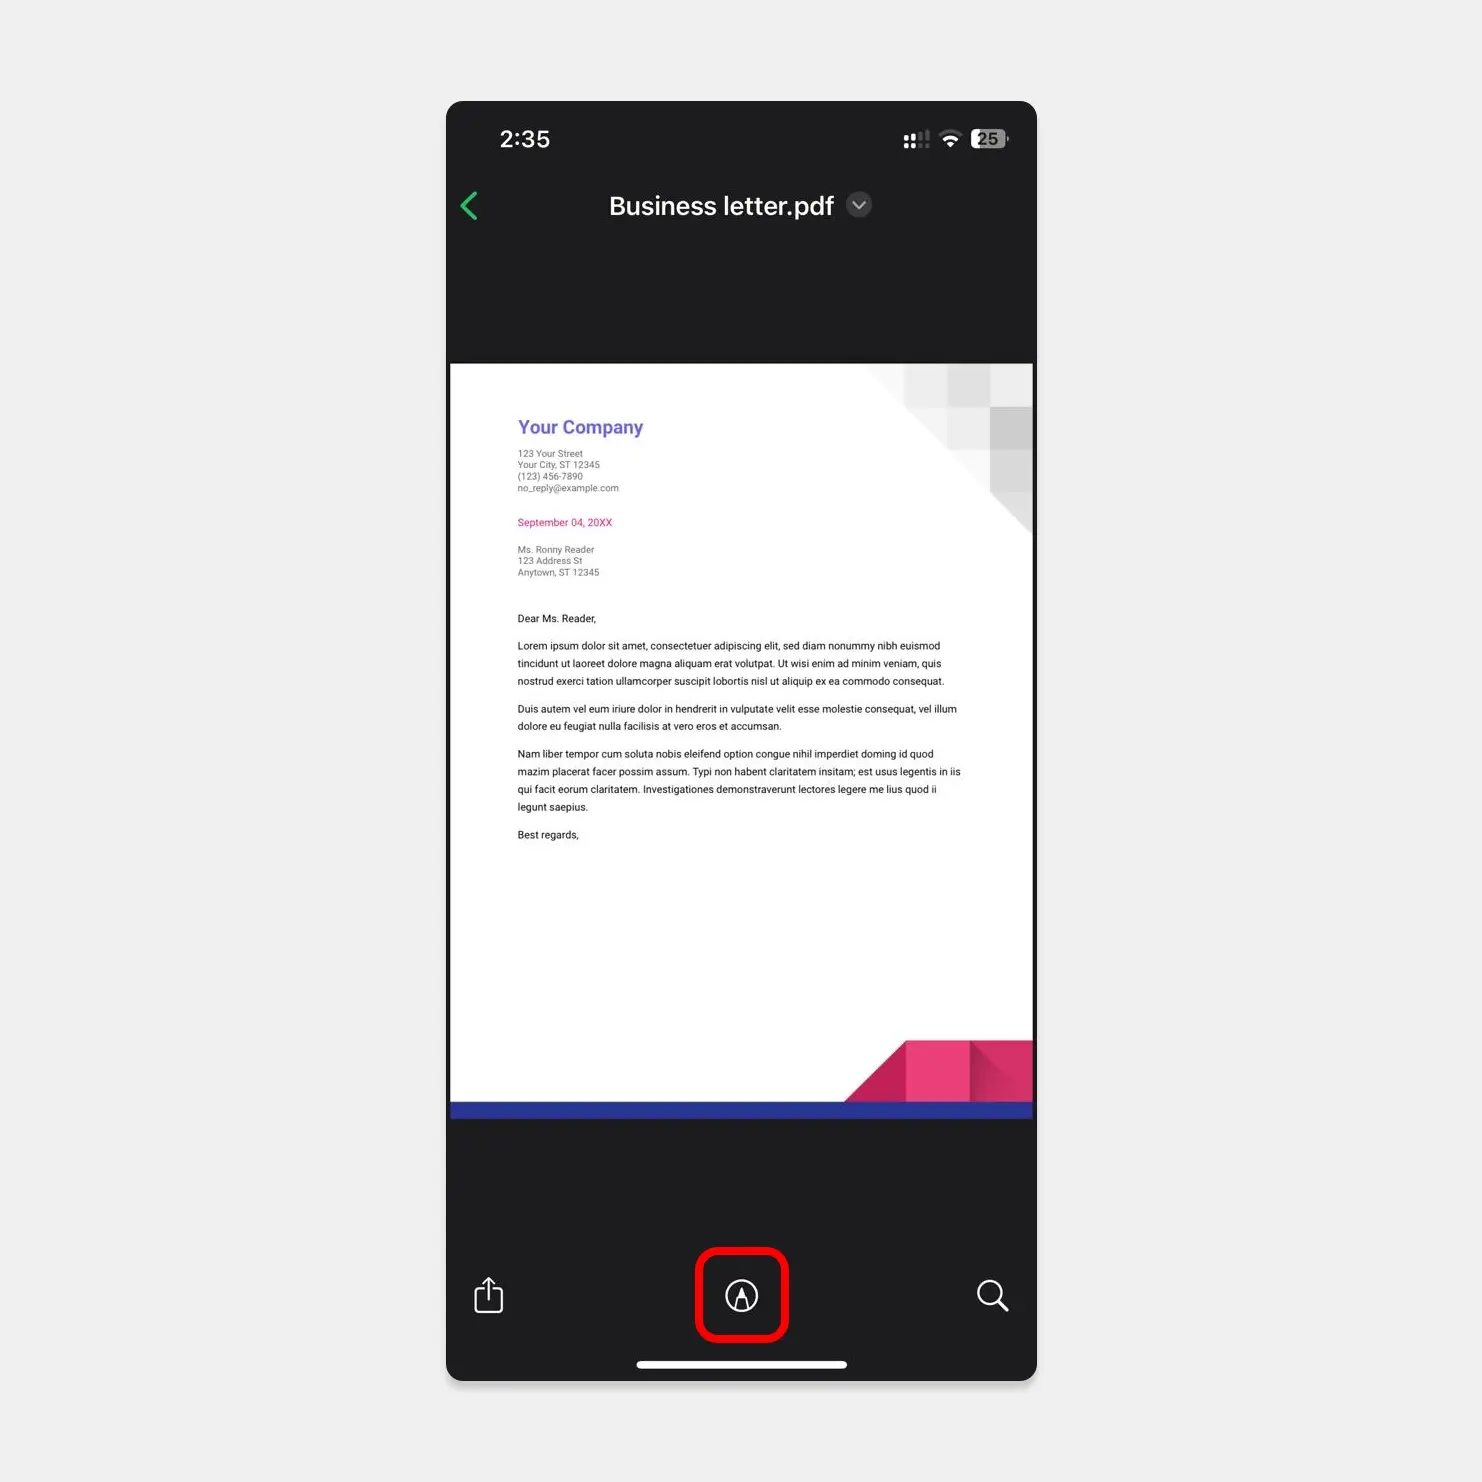
3. From here, you will see bunch of writing tools that you can use to write or highlight directly anywhere on your document. Additionally, you will see a “+” icon at bottom right corner. Tap on that.
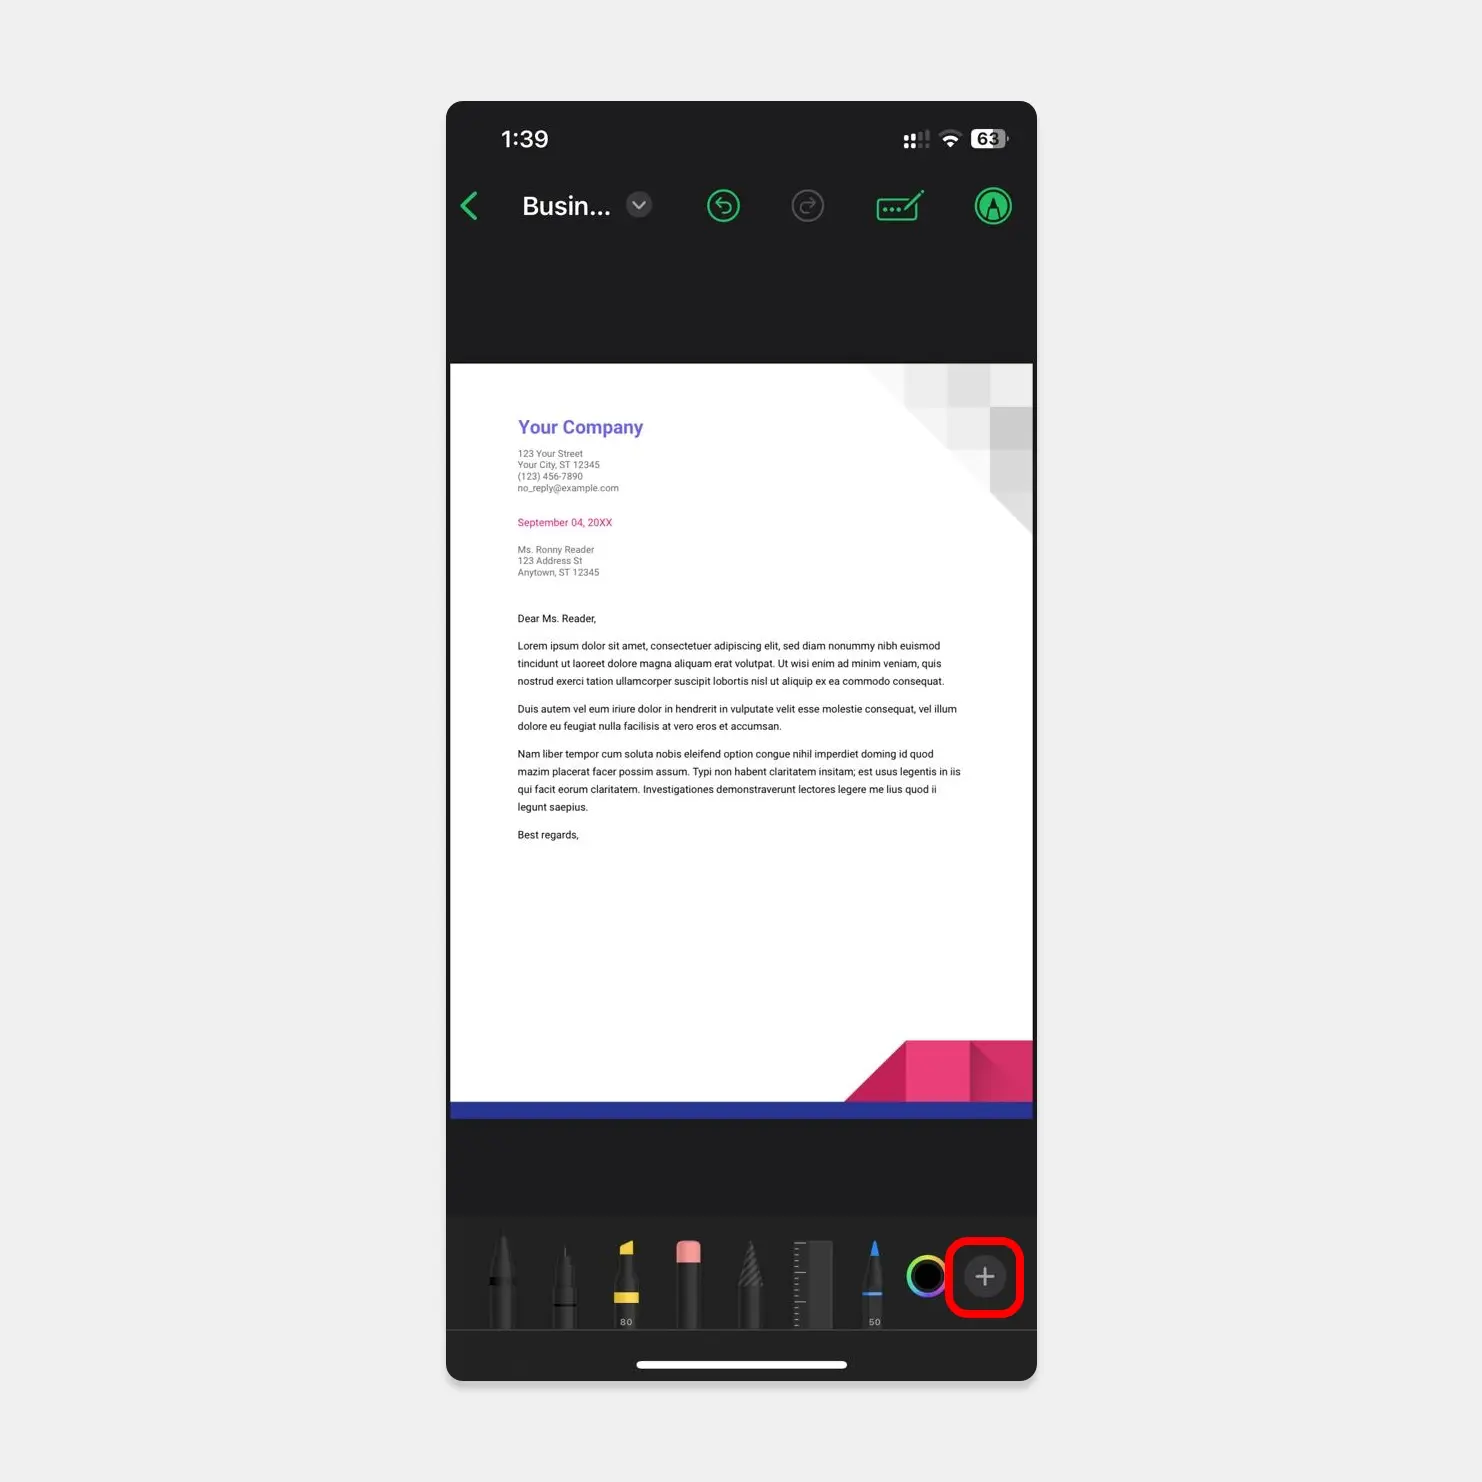
4. This will open a pop-up that will have lots of options, but if you want to add a handwritten signature, tap on “Add Signature“.
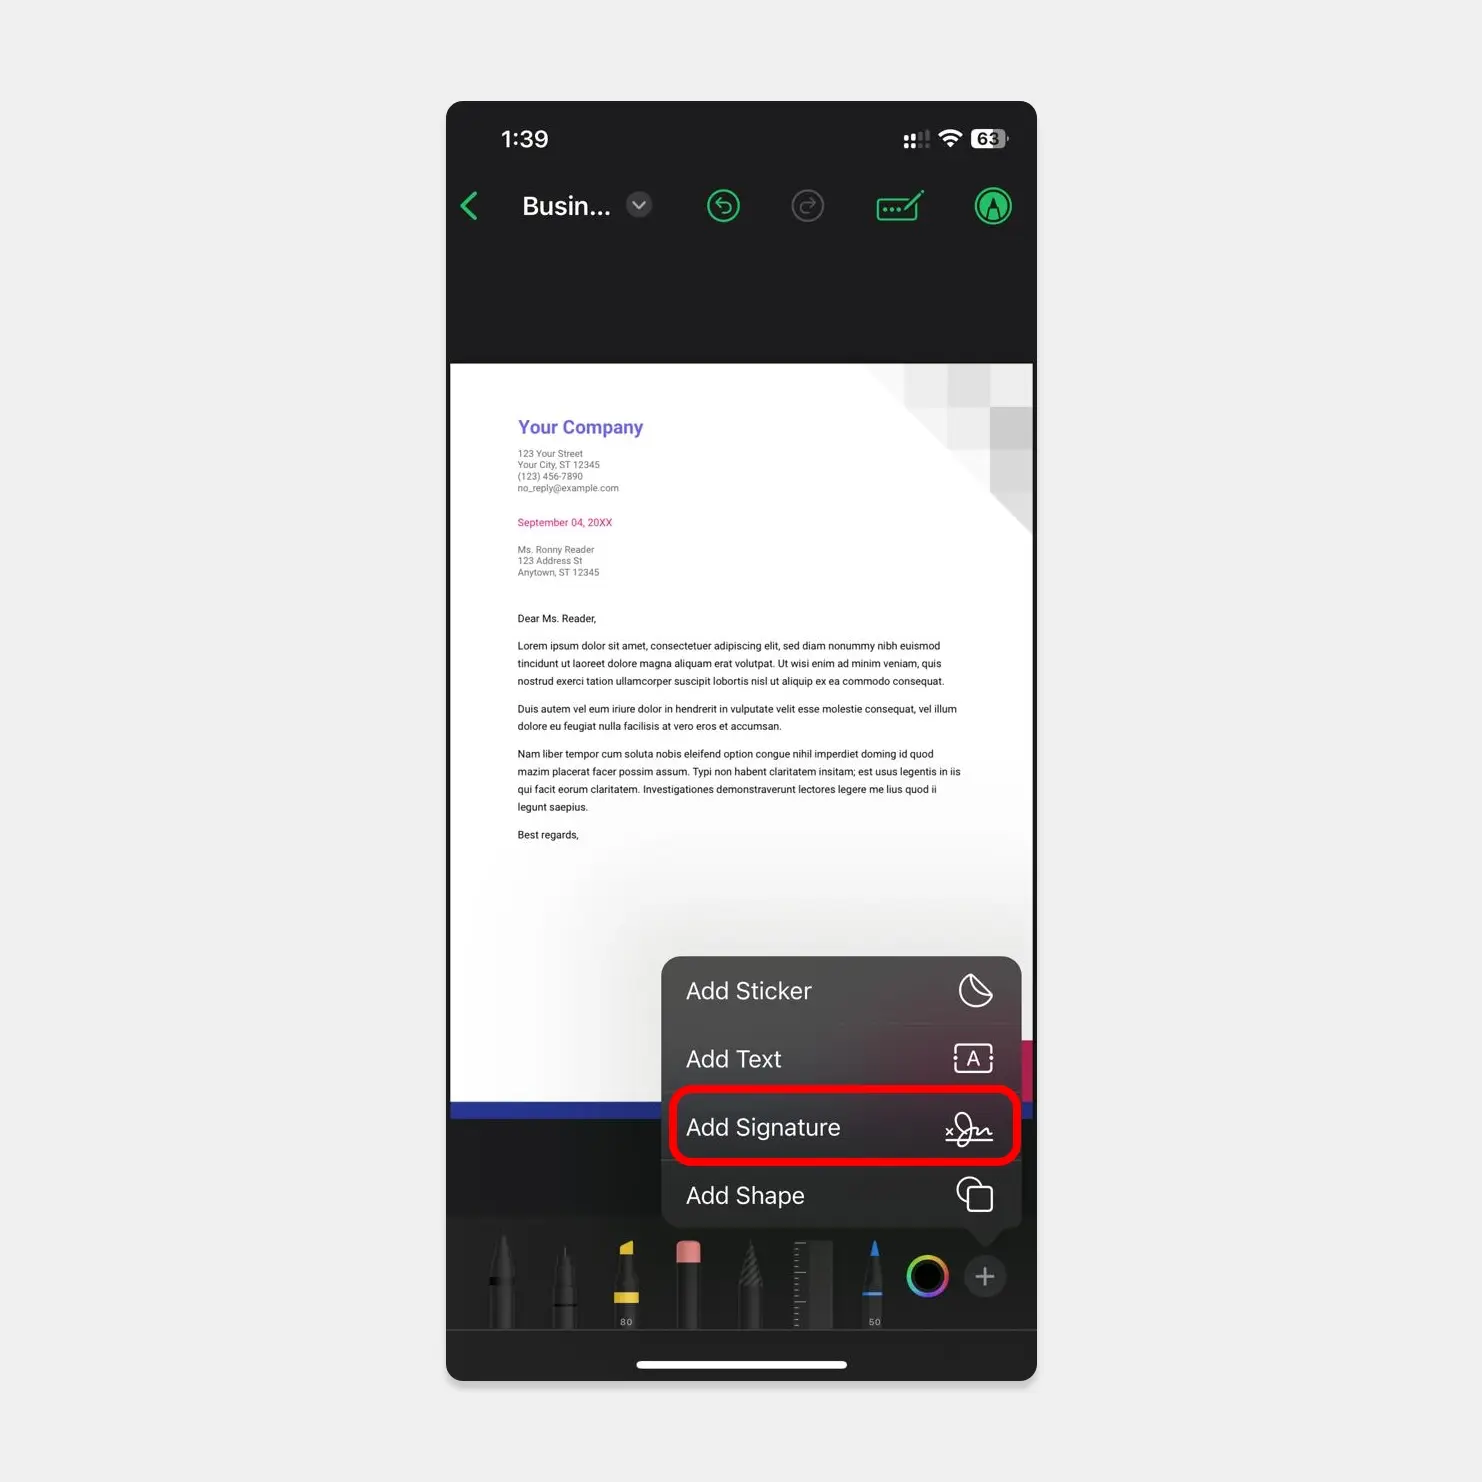
5. This will open a blank screen, allowing you to sign your name using your fingers. If you are not happy with the sign, you can tap “Clear” and try again. Once you are happy with your signature, tap “Done” to continue.
6. Now you can freely move around your signature and even scale it according to your liking. Moreover, you can tap the “Line” shaped icon to adjust it’s thickness and color as well.
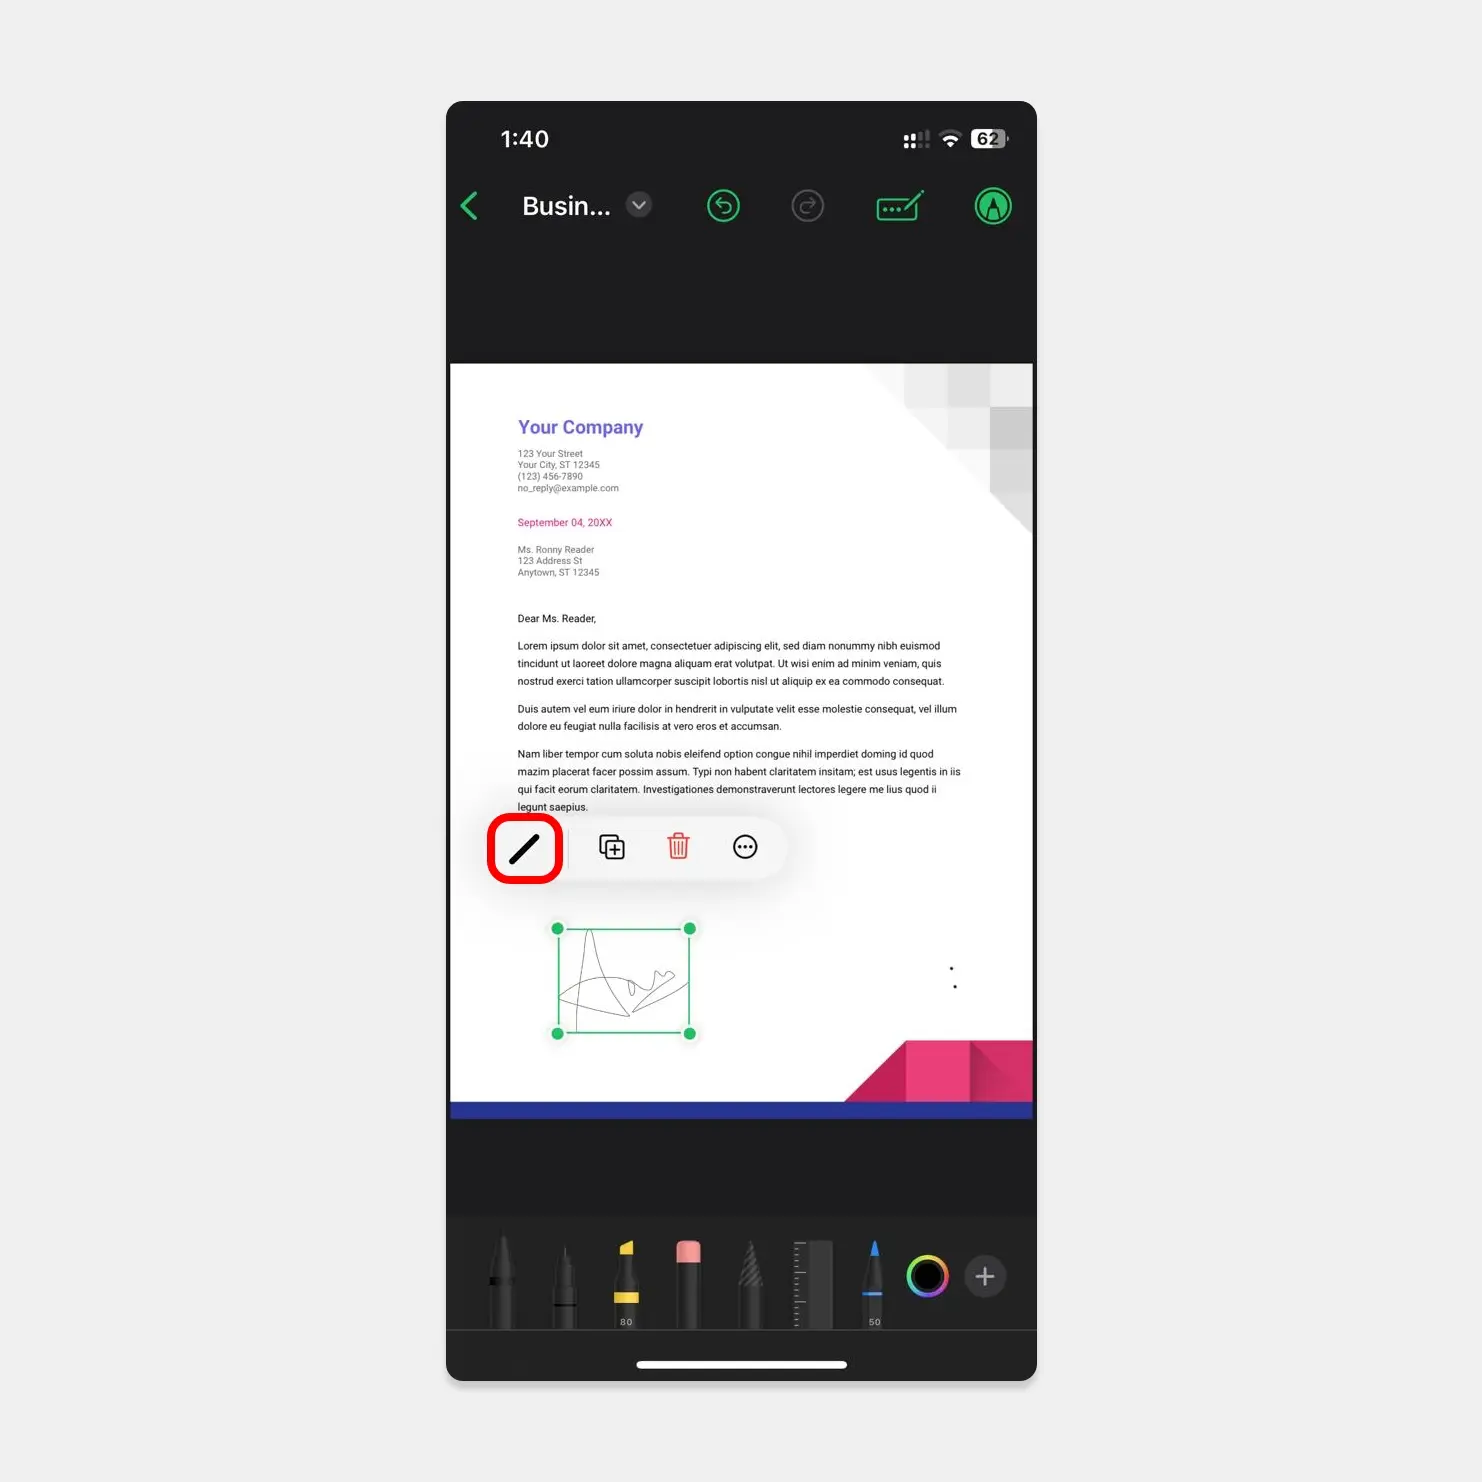
7. Once you are happy with everything, you can save it and you are good to go. The best part about this signature method is that it will save your signatures in it, so whenever you need to sign a signature, just use the exisitng one on the go.

This feature makes it a lot easier and fun to add a signature on any document on the go without needing to download any third-party apps.
How to do signatures on documents using any browser (Smallpdf.com)
It’s always good to know more than one method to do anything as you never know you or your friend might want to resort for other options. There is a free website that allows you to sign documents on the go. You can use this website on any device.
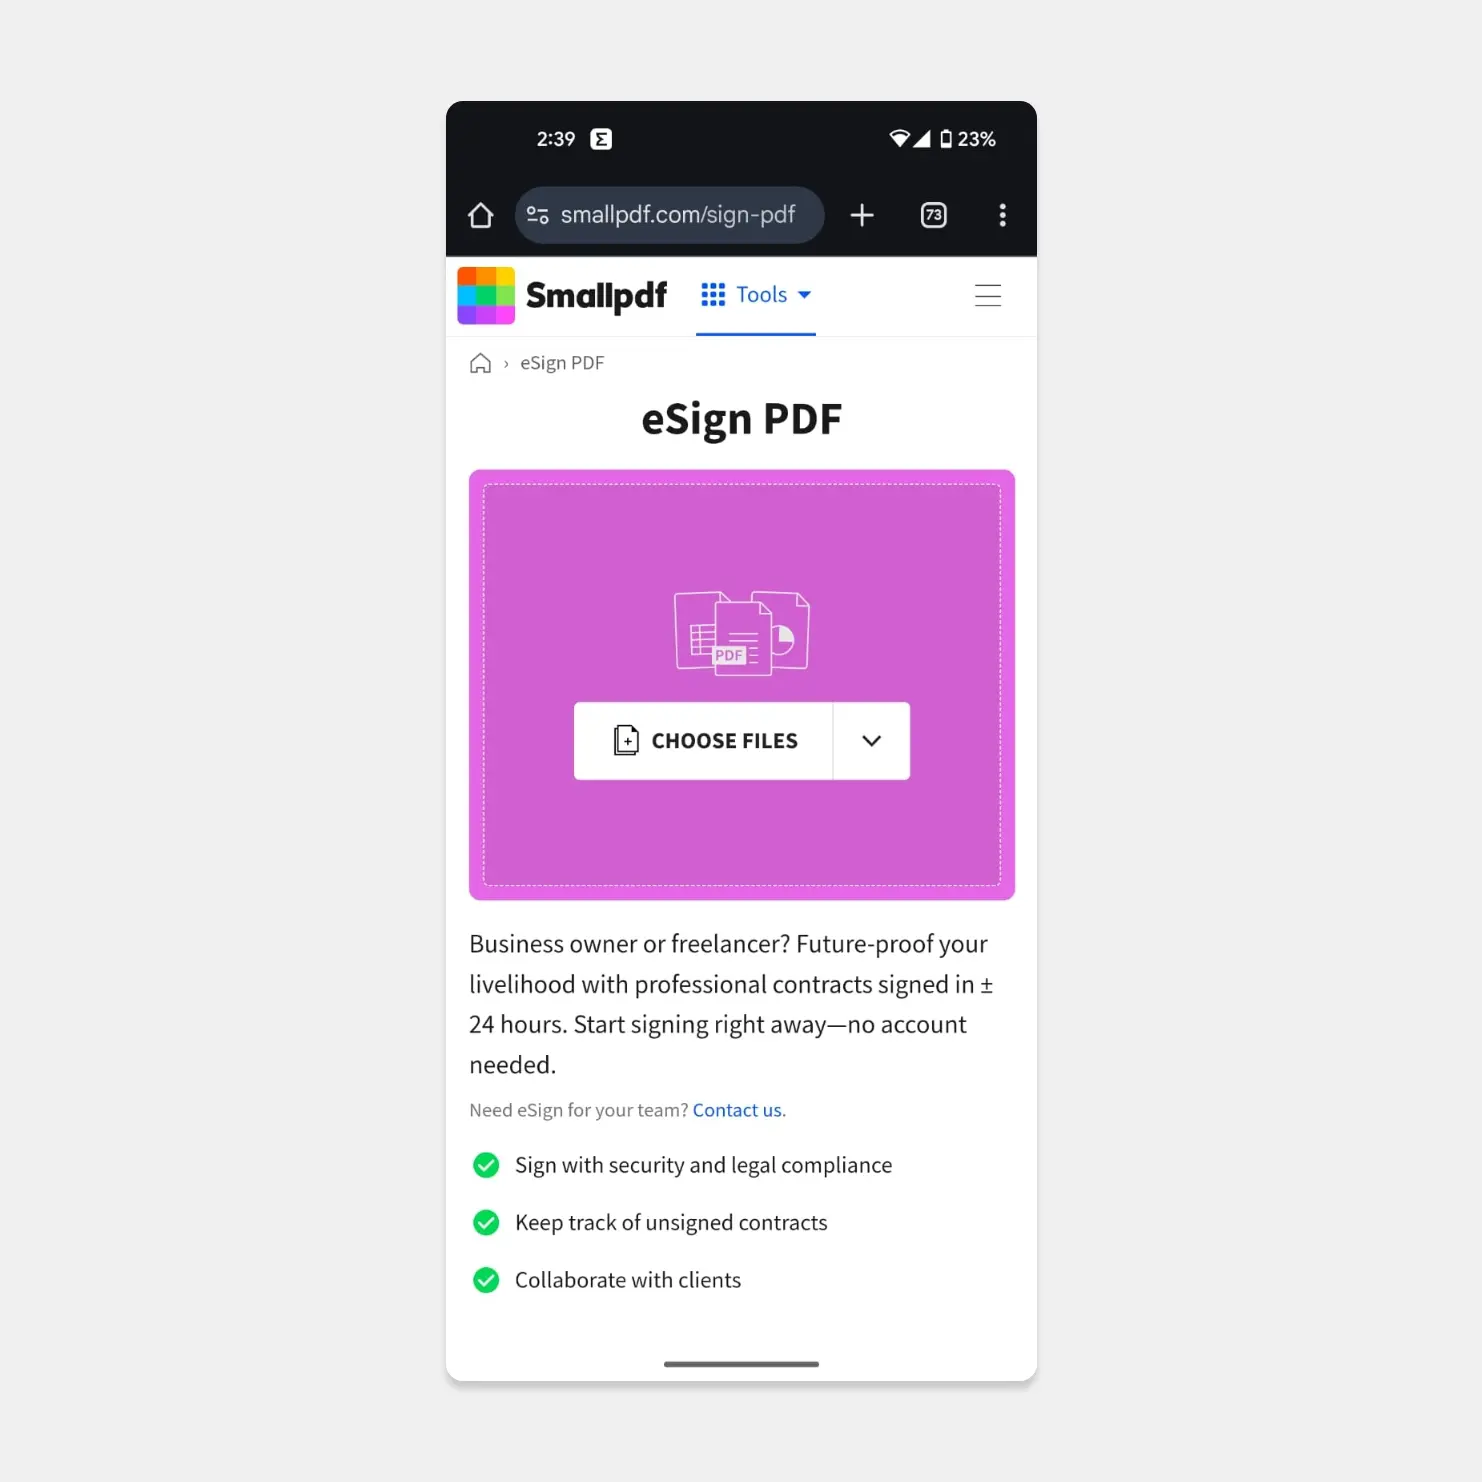
1. Open the “eSign Pdf” feature on the Smallpdf.com website.
2. Tap the “Choose Files” option and find and open the document that needs your signature on it.
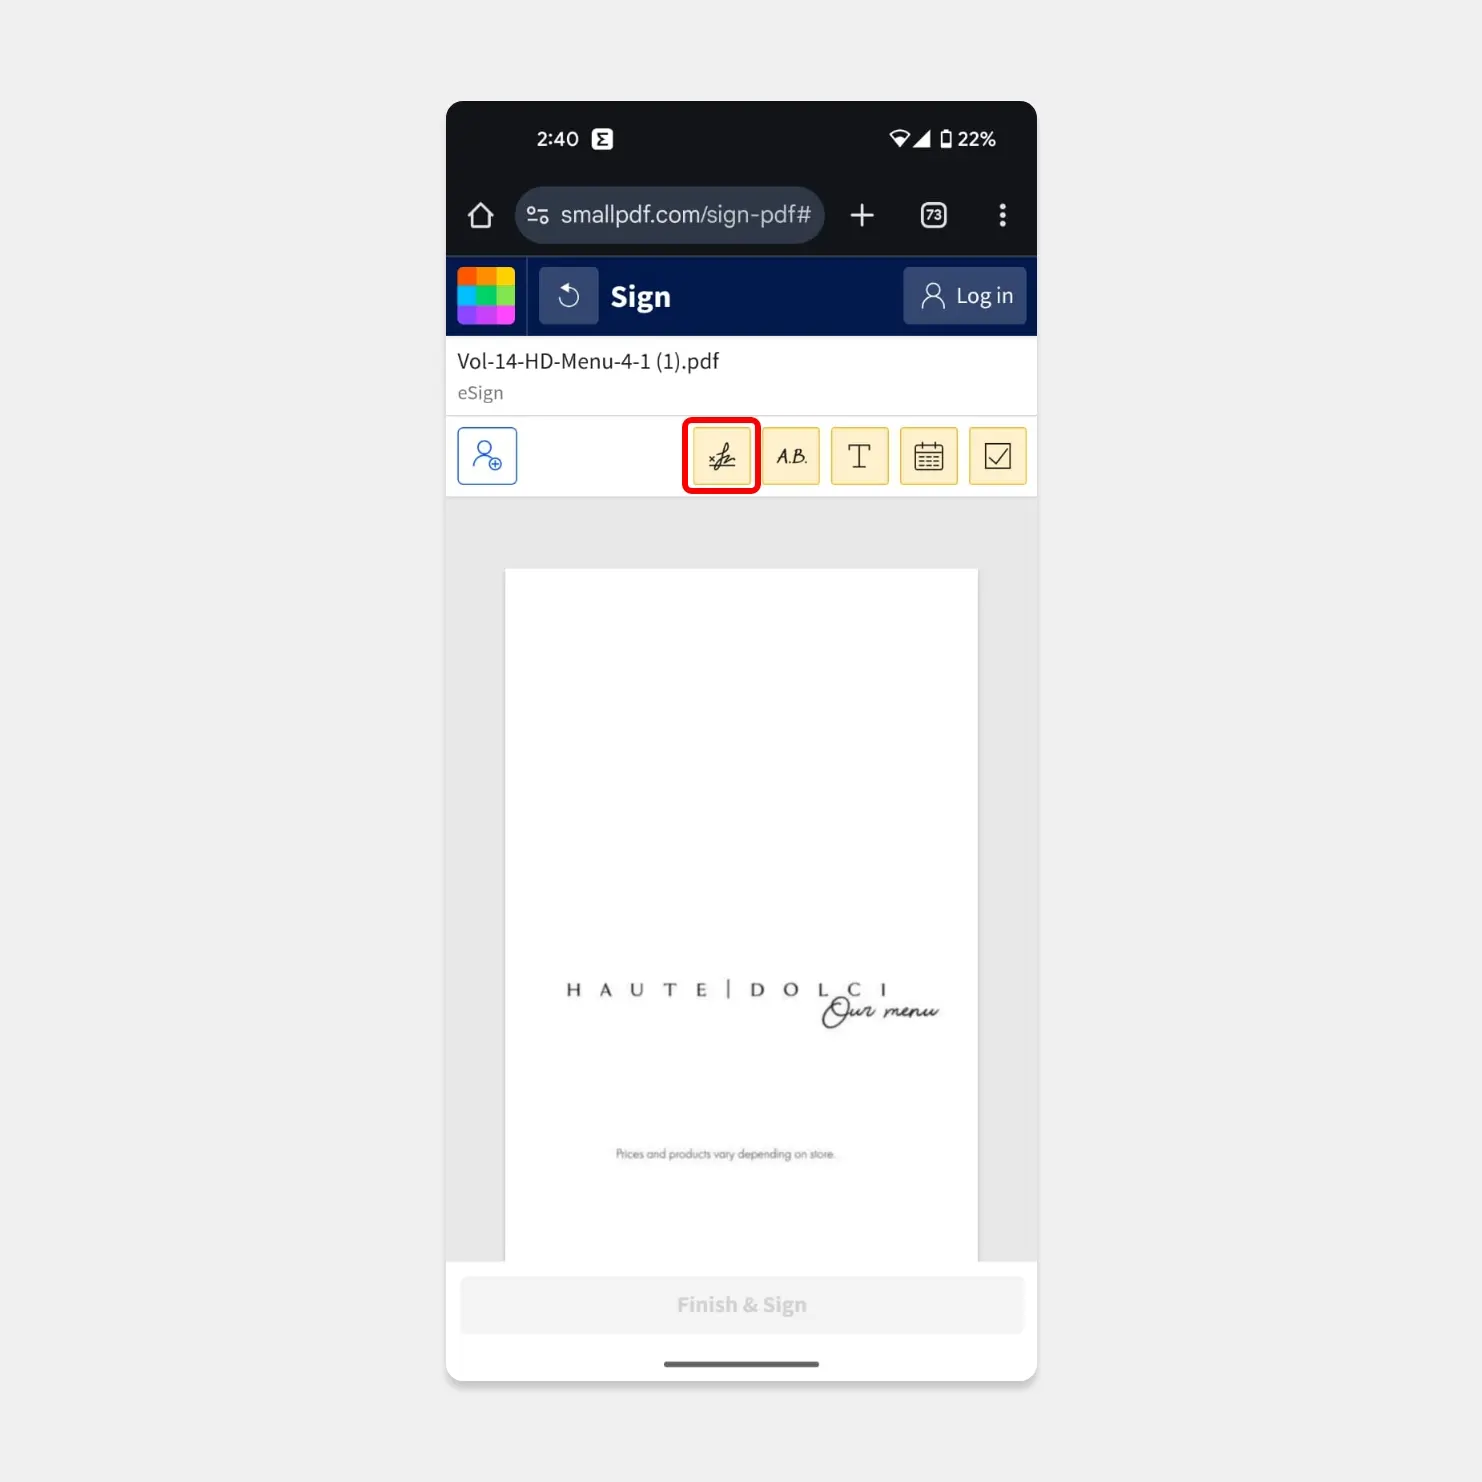
3. Once your document is uploaded, you can tap on a signature icon located at the top of the screen.
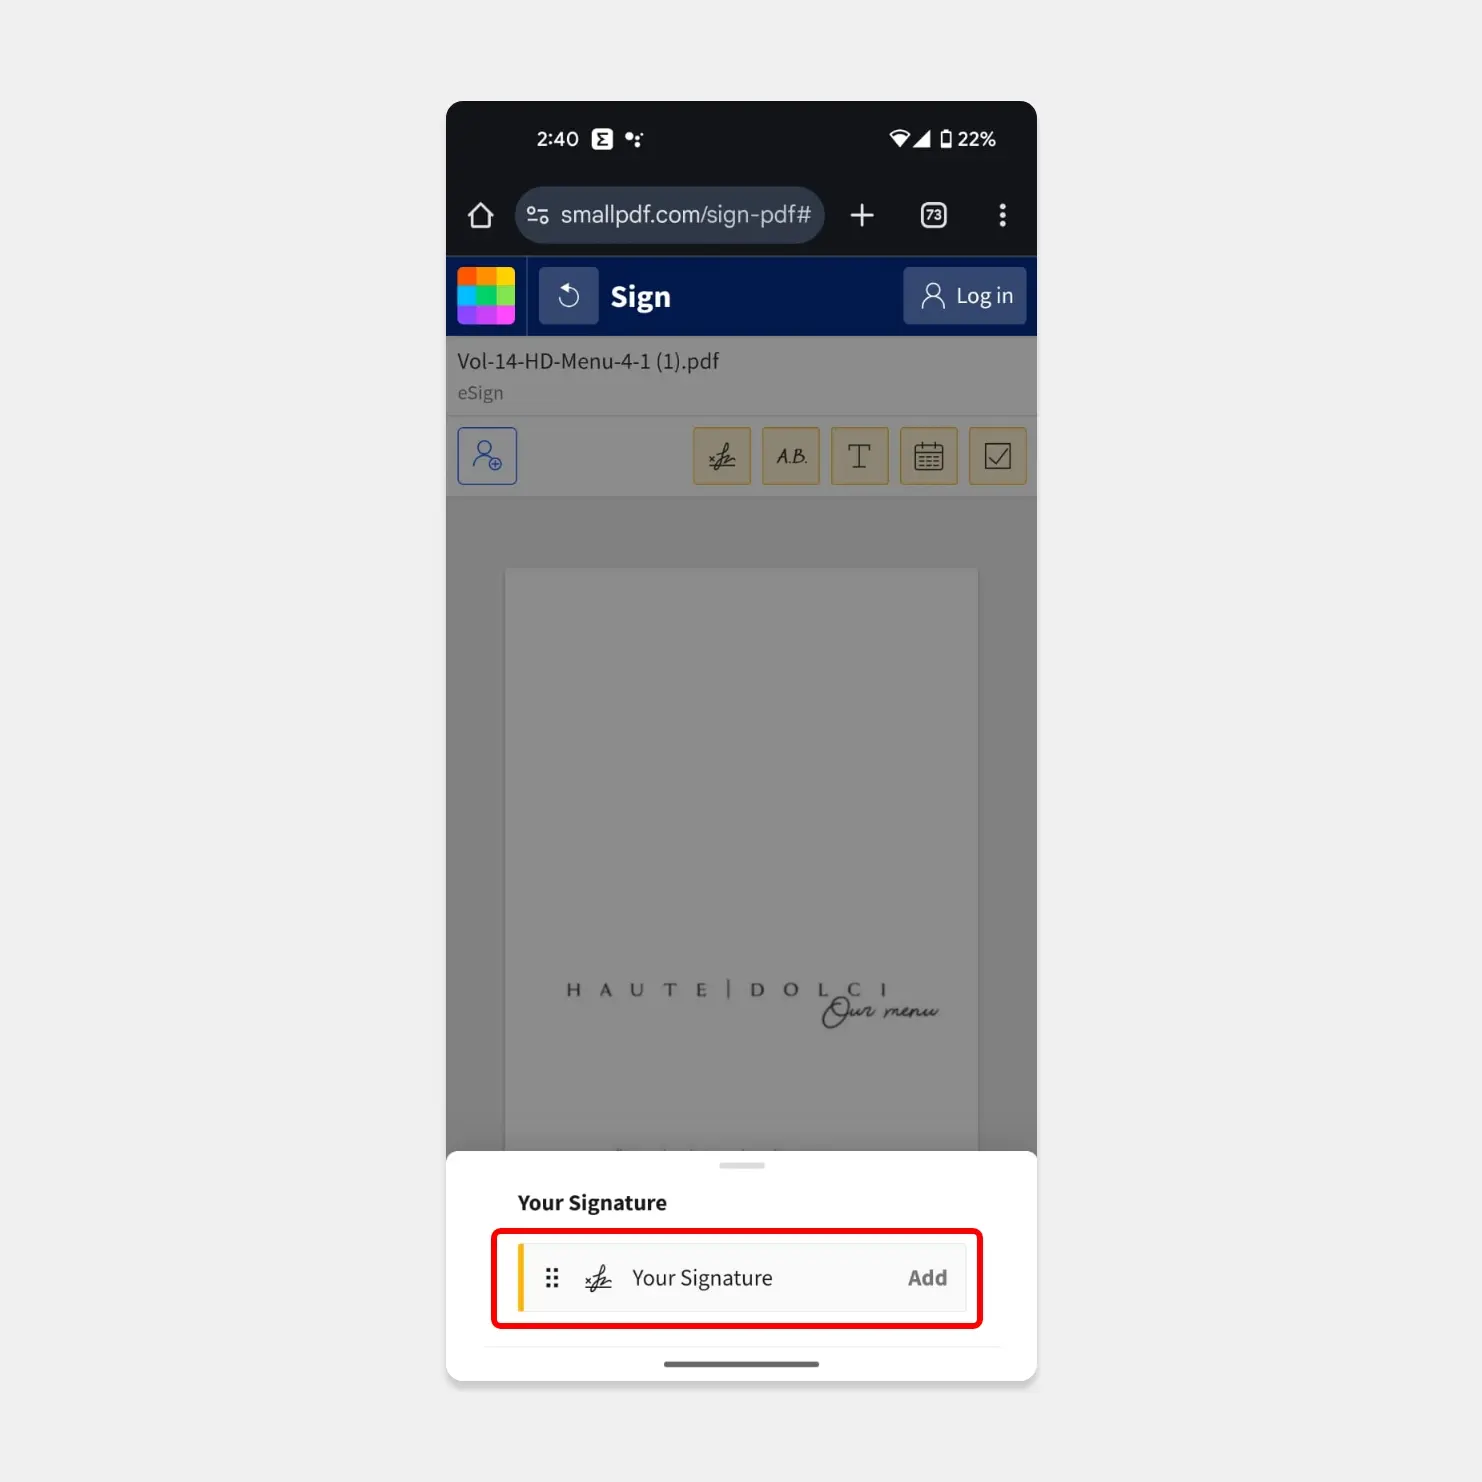
4. This will open a popup asking you to add your signature. Tap on the “Add” button to continue.
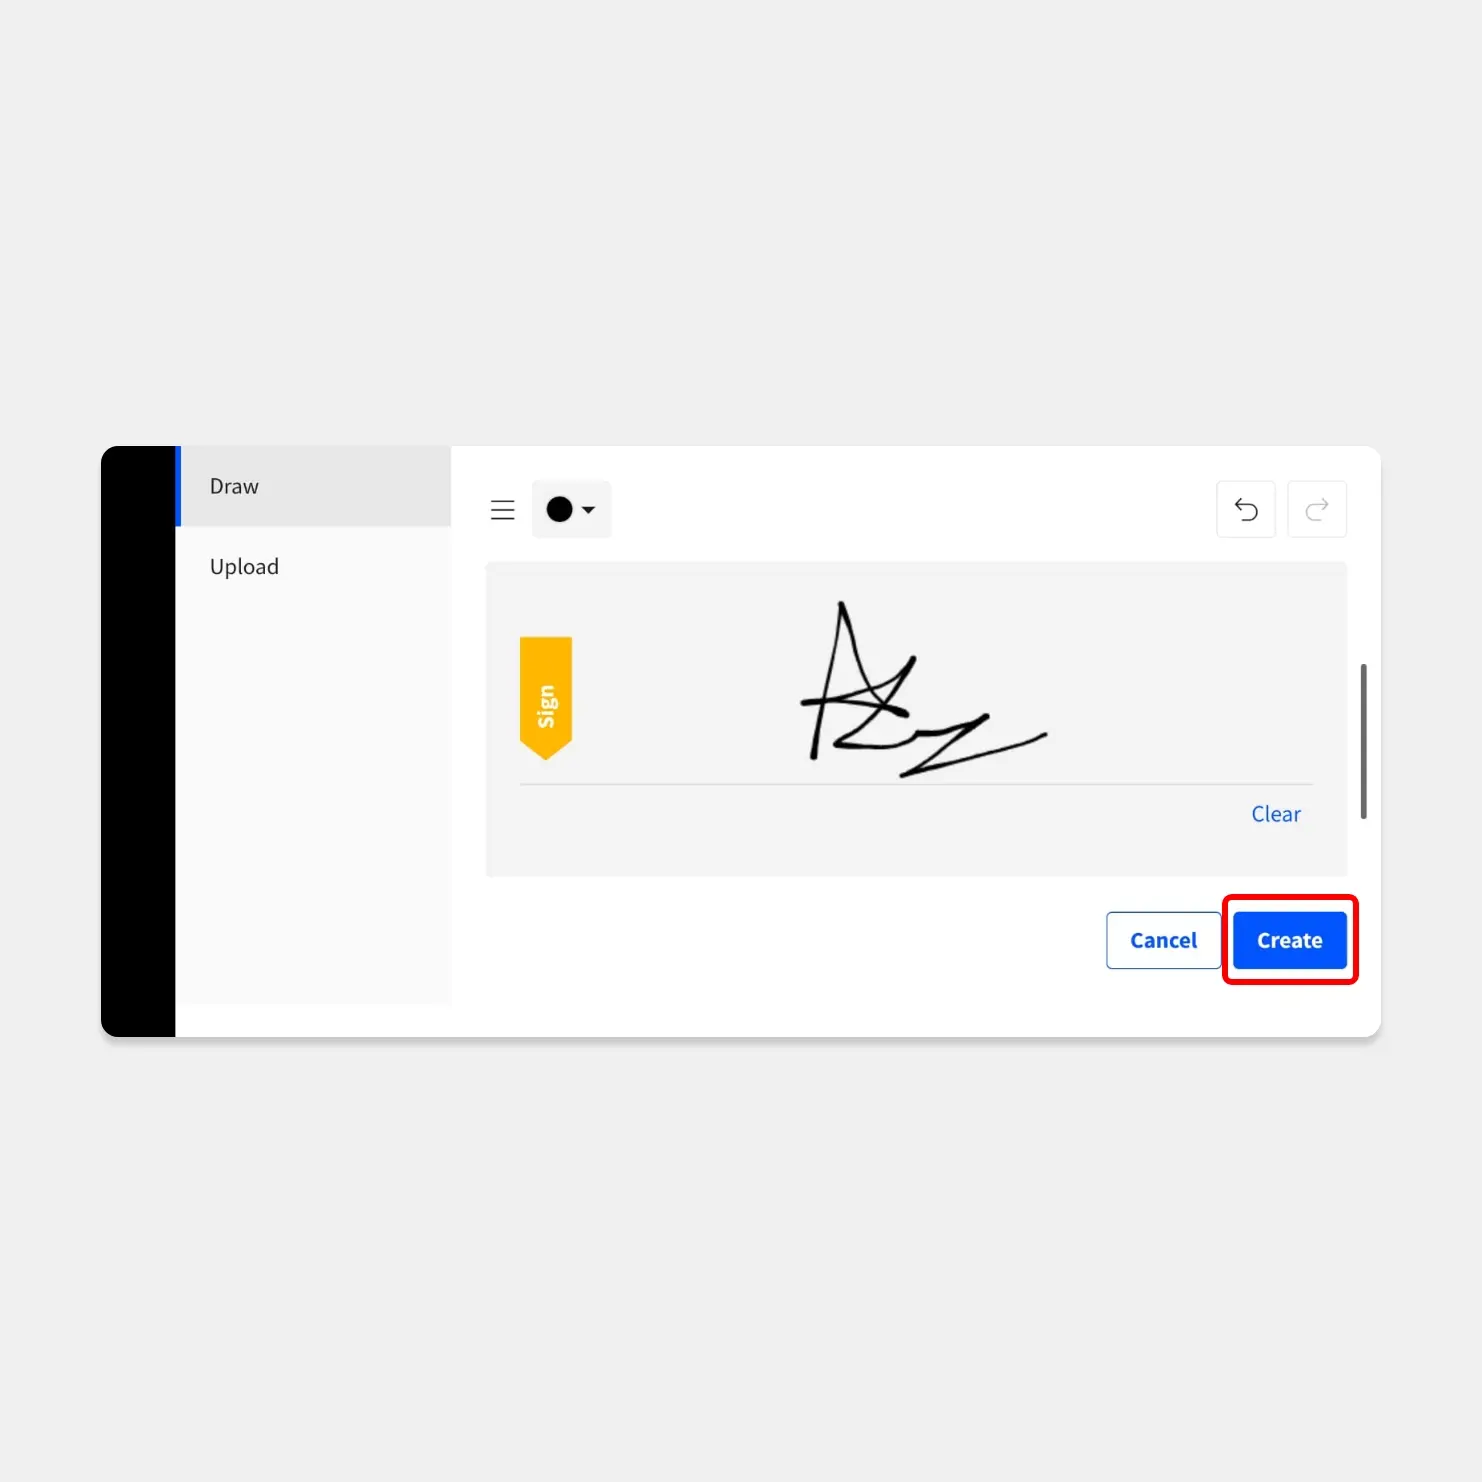
5. It will rotate your screen to landscape mode making it easier for you to sign with your finger. You can also upload any existing signs as well. Once you are happy with your sign, tap on the “Create” option.
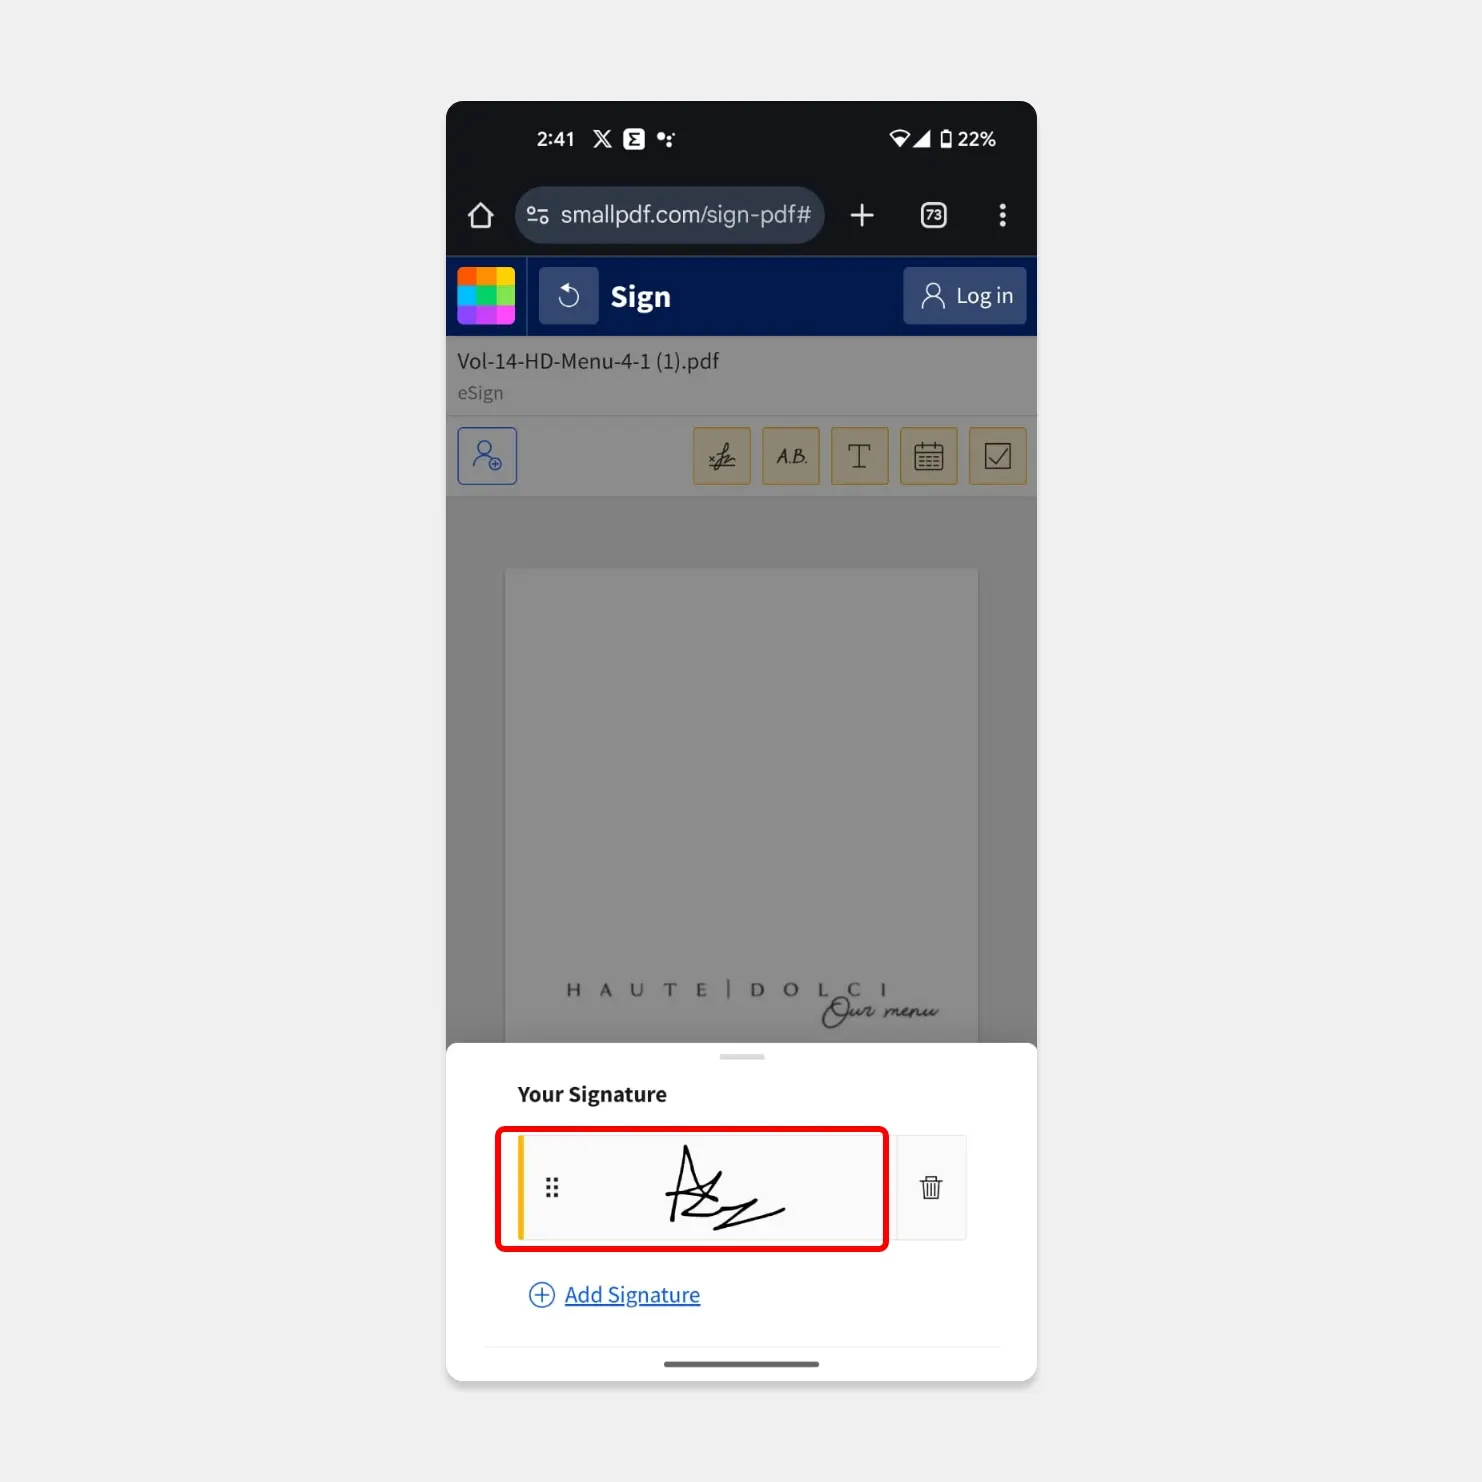
6. From here on just tap on the signature you just created from the bottom of your screen and it will place that into your document. You can change the color, scale it, and place it anywhere you want in the document.
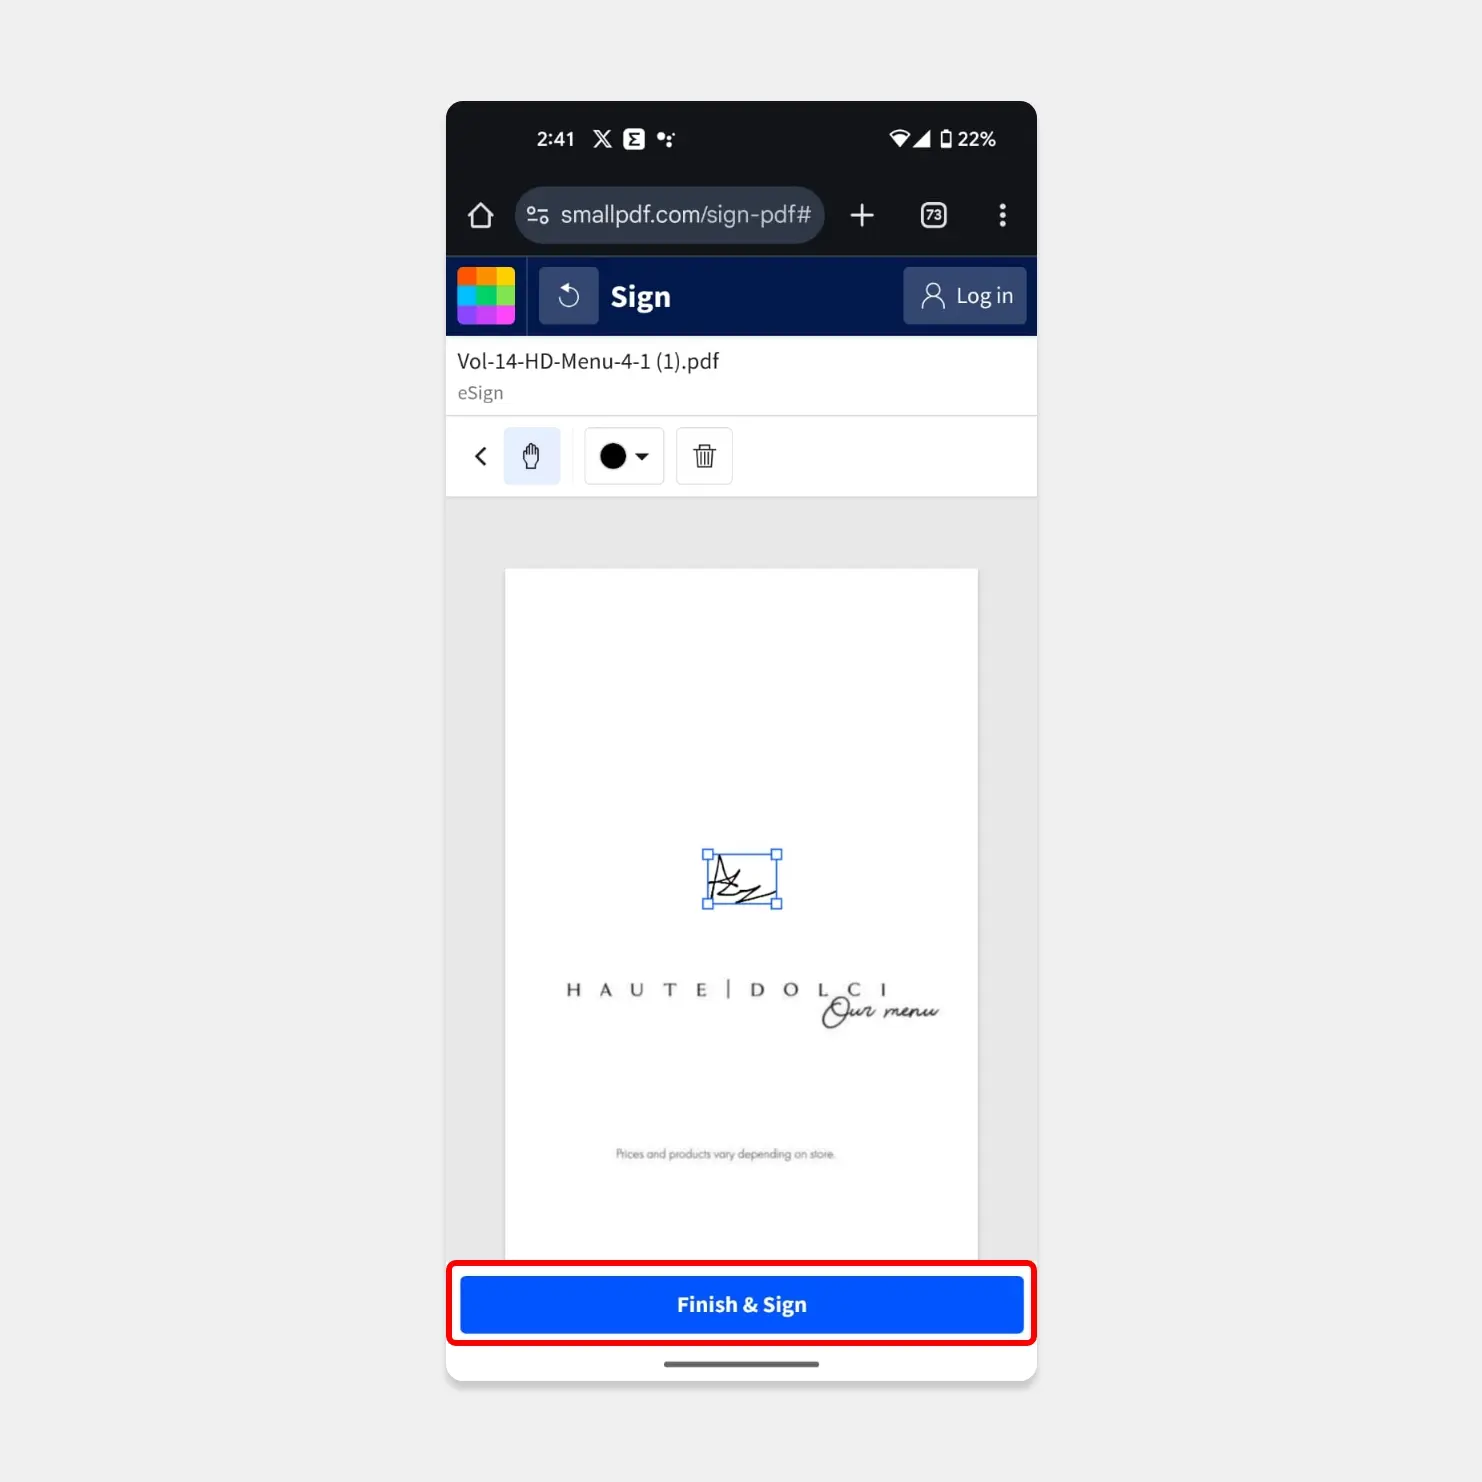
7. Once you are happy with the placement, Tap on “Finish and sign”. It will take processing time and give you a successful prompt that your sign has been added.
8. From here onwards, you can click “Download” to download and save the signed document on your device.
This method is not limited to iPhone users. As this is a browser-based solution, you can open the website on your Android or laptop as well to get the job done. This is all you need to know in order to sign documents and PDF on your iPhone for free. If you like this guide, make sure to keep coming back for more.


